之前学习php的时候,卸载了mysql,现在学习javaweb发现忘了怎么安装mysql,安装完了来记录一下,为了防止自己以后再次重新安装mysql不知道怎么办
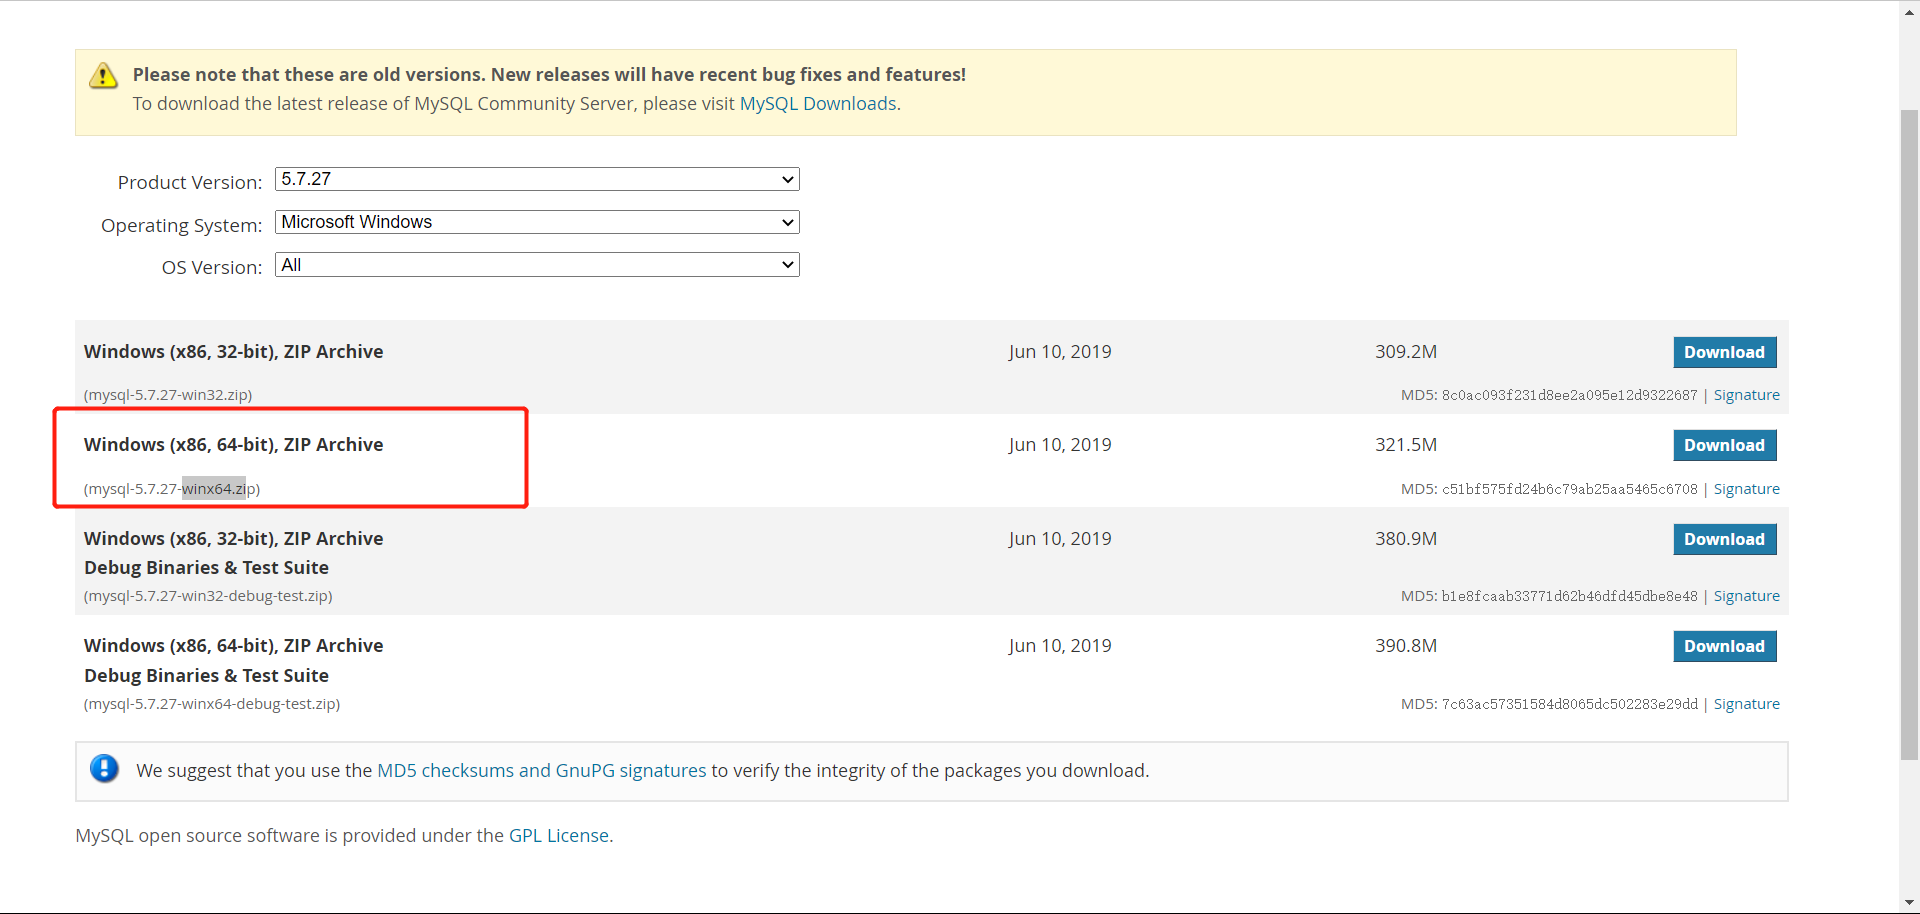
安装 我是下载的mysql安装包,不是下载的软件。mysql安装包 ,选择自己想要安装的版本,这里我选择的是5.7.27.
选择win64版本
安装解压后,在解压的文件夹根目录创建一个 my.ini
1
2
3
4
5
6
7
8
9
10
11
12
13
14
15
16
17
18
[client] # 设置mysql客户端默认字符集 default-character-set=utf8 [mysqld] # 设置3306端口 port=3306 character_set_server=utf8 # 解压目录 basedir=D:\lib\mysql # 解压目录下data目录 datadir=D:\lib\mysql\data default-storage-engine=INNODB sql_mode=NO_ENGINE_SUBSTITUTION,STRICT_TRANS_TABLES [WinMySQLAdmin] D:\lib\mysql\bin\mysqld.exe
配置环境变量
在新增系统变量下 新增 MYSQL_HOME ,路径为 mysql解压后的根目录。
在系统变量中新增 %MYSQL_HOME%\bin
初始化mysql 打开命令行,进入自己mysql安装目录的bin目录下
1
2
3
4
5
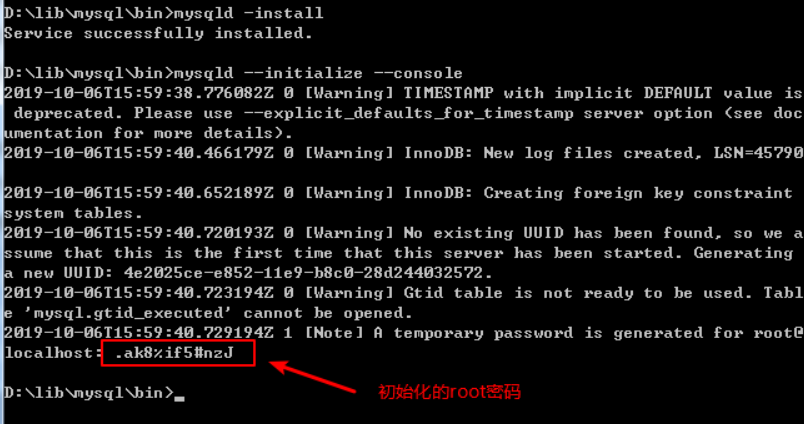
先输入 mysqld -install 初始化数据库 mysqld --initialize --console // 初始化mysql
输入mysqld -install时
成功:出现Service successfully install代表你已经安装成功
失败:出现 Install/Remove of the Service Denied!表示安装失败
失败解决办法: 使用管理员身份重新运行命令行输入命令,即可。
初始化后,会得到mysql的初始密码。
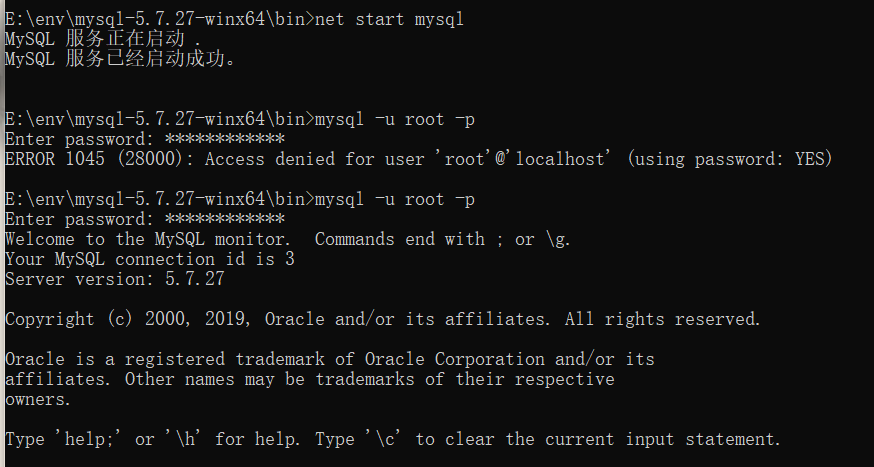
启动mysql 1 2 3 4 5 6 7 net start mysql 使用mysql mysql -u root -p 然后输入刚才的密码,成功即可进入mysql中 #
修改mysql密码 1 2 mysql> alter user 'root' @'localhost' identified by '123456' ; mysql> flush privileges;
使用quit退出
输入 mysql -u root -p ,然后尝试新密码
MySQL出现的问题 启动MySQLnet start mysql时,报服务名无效错误 解决办法:进入MySQL的安装目录下的bin目录,使用管理员命令行窗口,输入mysqld --install
提示:Service successfully installed 即表示成功
若提示 Install/Remove of the Service Denied!,请使用管理员命令行窗口
MySQL简单使用 MySQL数据库的操作 1 2 3 4 5 6 7 8 9 10 11 12 13 14 1.查看所有数据库 show databases; 2.创建数据库 create database 数据库名 charset=utf-8; 3.使用数据库 use 数据库名 4.查看当前使用的数据库 select database(); 5.删除数据库 drop database 数据库名
MySQL表的操作 1 2 3 4 5 6 7 8 9 10 11 12 13 14 15 16 17 18 19 20 21 22 23 24 25 26 27 28 29 30 31 32 33 34 35 36 37 1.查看当前数据库中所有的表 show tables; 2.创建表 create table 表名(字段名称 数据类型 可选的约束条件,column1,datatype contrai,....); 3.修改表字段类型 alter table 表名 modify 列名 类型 约束; 4.修改表中字段名 alter table 表名 change 原字段名 新字段名 字段类型; ## 字段类型不能为空 5.在表中添加字段 # alter table 表名 add 字段名 字段类型 # alter table 表名 add 字段名 字段类型 first # alter table 表名 add 字段名 字段类型 after 指定字段 6.删除字段 alter table 表名 drop 字段名 7.修改字段位置 # alter table 表名 modify 字段名 字段类型 first # alter table 表名 modify 字段名 字段类型 after 指定字段 8.删除外键约束 alter table 表名 drop foreign key 外键约束名 9.删除表 drop table 表名 10.查看表结构 desc 表名;
MySQL创建表的具体类型 1 2 3 4 5 6 7 8 9 10 11 12 13 14 15 16 17 18 19 20 21 22 23 24 25 26 27 28 29 30 31 32 33 34 35 36 37 1.添加主键 id int primary key 或者 id int , primary key (id) // 括号里可以写多个,设置多个主键 2. 设置外键 CONSTRAINT 外键名 FOREIGN KEY 字段名 REFERENCES 主表名(主键名) 3.添加唯一约束 id int unique 4.添加非空约束 id int not null 5.自增约束 id int auto_increment 6.默认约束 id int default '男' 7.创建视图 create view 视图名 as select 字段名 from 表; 8.删除视图 drop view 视图名 9.创建索引 ## 唯一索引 create unique index 索引名 on `表名`(`字段名`) ## 普通索引 create index 索引名 on `表名`(`字段名`) ## 主键索引 primary key 10.创建组合索引 alter table 表名 add index 索引名(索引z)
MySQL查询 1 2 3 4 5 6 7 8 9 10 11 12 13 14 15 16 17 18 19 20 21 22 23 24 25 26 27 ## 基本查询 select * from 表名 ## 范围查询 select * from 表名 between 值 and 值 ## 模糊查询 select * from 表名 where 字段名 like '%字符%' ## 以 xx 开头的字符 select * from 表名 where 字段名 like 'xx%' ## 以 xx 结尾的字符 select * from 表名 where 字段名 like '%xx' ## 第二个字符为 x select * from 表名 where 字段名 like '_x%' ## 倒数第二个字符为 x select * from 表名 where 字段名 like '%' ## 去除重复的结果 select distinct 字段名 from 表名 ## 限制查询数量 select * from 表名 limit 1,4 // 查询第 2-5 的数据 ## 对查询的结果排序 select * from 表名 order by 字段名 desc(降序)|asc(s)
连接查询和聚合查询 1 2 3 4 5 6 7 8 9 10 11 12 13 14 15 16 17 18 19 20 21 22 23 ## 内连接查询 S,C 分别是表 student class 的别名 select S.id , C.class from student as S join class as C where S.classid = C.id; ## 外连接查询 ## 左外连接查询 显示出所有 student表中的id select S.id , C.class from student as S left join class as C where S.classid = C.id; ## 右外连接查询 显示出所有 class表中的 class select S.id , C.class from student as S right join class as C where S.classid = C.id; ## 聚合查询 count() 计数 sum() 求和 avg() 求平均值 max() 求最大值 min() 求最小值
MySQL count多个表操作
参考 https://www.jianshu.com/p/79ea682dbe1f
1 2 3 4 5 6 7 8 9 10 11 12 13 14 15 16 17 18 19 20 21 22 23 24 25 26 27 28 29 30 31 select sum (thesisCount) thesisCount , sum (awardCount) awardCount , sum (academicCount) academicCount , sum (projectCount) projectCount , sum (teaAchievementCount) teaAchievementCount from ( select count (* ) thesisCount , 0 awardCount , 0 academicCount , 0 projectCount , 0 teaAchievementCount from thesis where UserId = 201202001 and status = 1 and Year (PublicDate) = 2024 UNION ALL select 0 thesisCount,count (* ) awardCount , 0 academicCount , 0 projectCount , 0 teaAchievementCount from award where UserId = 201202001 and status = 1 and Year (PublicDate) = 2019 UNION ALL select 0 thesisCount,0 awardCount , count (* ) academicCount , 0 projectCount , 0 teaAchievementCount from academicbook where UserId = 201202001 and status = 1 and PublicYear = 2018 UNION ALL select 0 thesisCount,0 awardCount , 0 academicCount , count (* ) projectCount , 0 teaAchievementCount from scientificproject where UserId = 201202001 and status = 1 and StartYear = 2018 UNION ALL select 0 thesisCount,0 awardCount , 0 academicCount , 0 projectCount , count (* ) teaAchievementCount from teachachievement where UserId = 201202001 and status = 1 and Year (Date ) = 2019 ) userCount;
结果:
MySQL-CRUD操作 1.增加数据 1 2 3 4 5 6 7 8 9 10 11 1.全列插入:值的顺序必须和字段顺序完全一致 insert into 表名 values(....); 2.部分列插入:值的顺序和给出的列的顺序对应 insert into 表名(列1....) values(值1 ...); 3.全列多行插入 insert into 表名 values(....),(....),(....); 4.部分列多行插入 insert into 表名(列1....) values(值1 ...),(值1 ...),(值1 ...);
2.修改数据 1 2 3 4 update 表名 set 列1 = 值1,列1=值2....where 条件 例子: update students set age=18,gender = '女' where id = 6;
3.删除数据 1 2 3 4 delete from 表名 where 条件 例子: deletefromstudents where id = 5;
MySQL数据-备份导出 1 2 # 备份-导出语法 mysqldump -u 用户名 -p 密码 数据库名字 表名字 > data.sql
MySQL数据-恢复导入 1 2 3 4 5 # 恢复导入语法 cd 到数据文件路径下 mysql -u 用户名 -p 密码 use 数据库 source data.sql
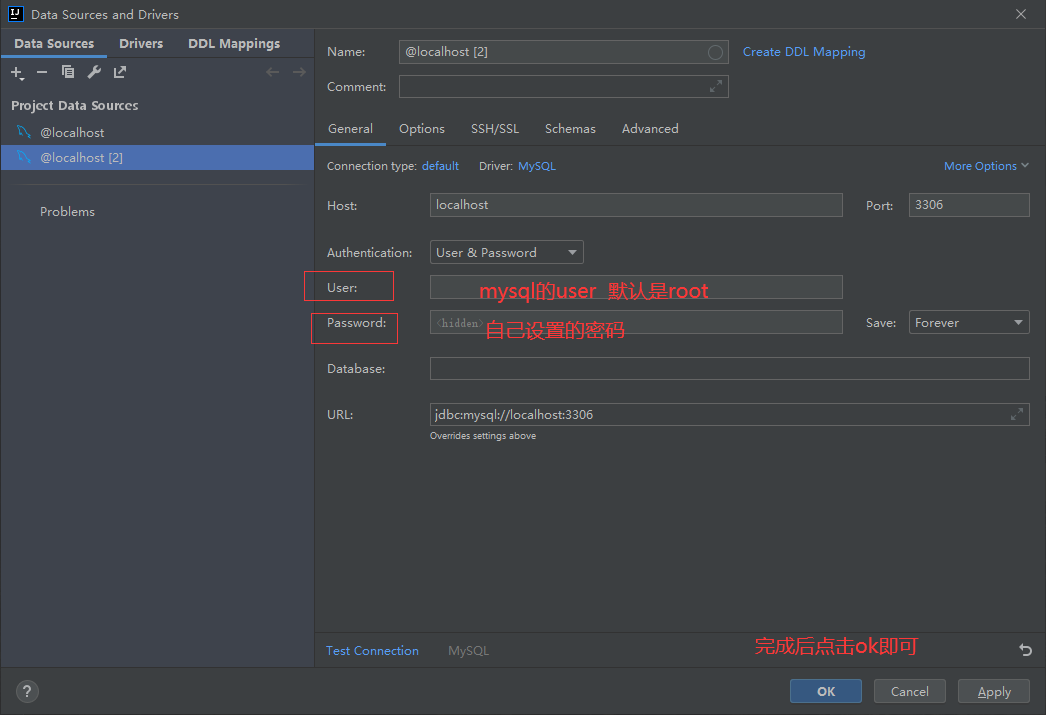
在Java中使用数据库(javaweb Android) idea连接mysql 首先确保自己的mysql启动中,然后再idea中连接mysql即可
(如果没有下载连接的jar需要先下载jar包,idea提示的download即可)
Android Studio 连接Mysql 在mainifests/AndroidManifest.xml下加入一下两行代码 1 2 <uses-permission android:name ="android.permission.INTERNET" /> <uses-permission android:name ="android.permission.ACCESS_NETWORK_STATE" />
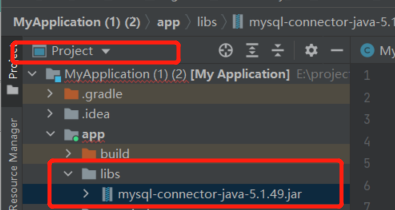
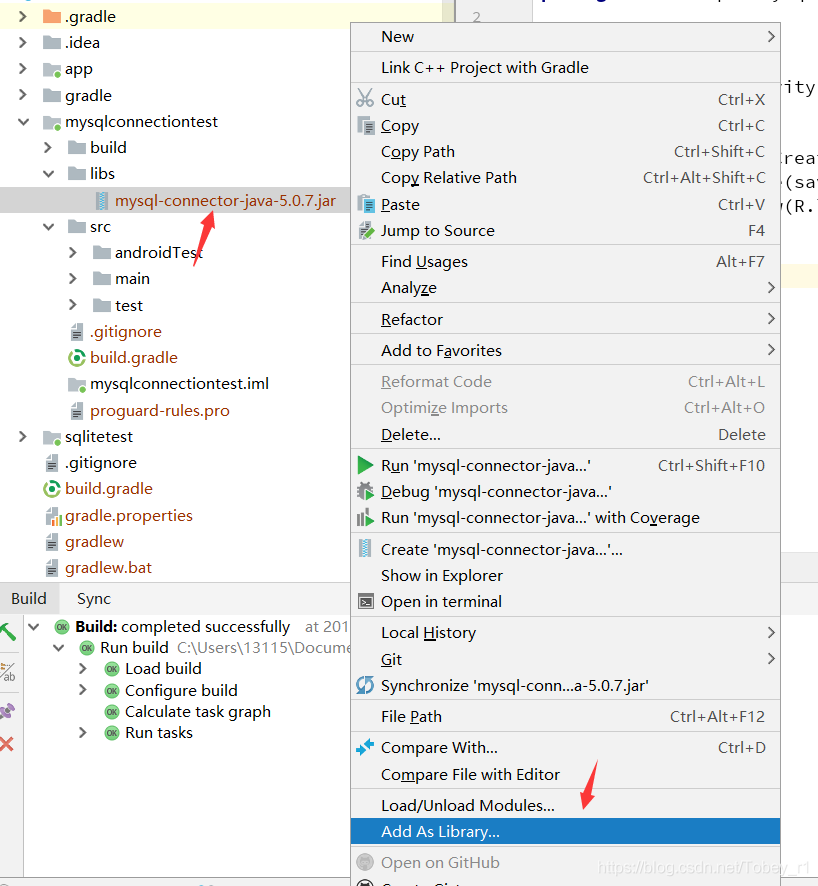
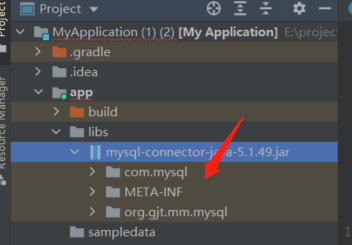
为工程导入mysql.jar包 下载地址 ,下载之后,将jar包拖入libs (project下)
出现下图这几个东西,表示成功
连接数据库,使用jdbc 新建一个mysql的数据连接类
1 2 3 4 5 6 7 8 9 10 11 12 13 14 15 16 17 18 19 20 21 22 23 24 25 26 27 28 29 30 31 32 33 34 35 36 37 38 39 40 41 42 43 44 45 46 47 48 49 50 51 52 53 54 55 56 57 58 59 60 61 62 63 64 65 66 67 68 import java.io.IOException;import java.io.InputStream;import java.sql.Connection;import java.sql.DriverManager;import java.sql.PreparedStatement;import java.sql.ResultSet;import java.sql.SQLException;import java.util.Properties;public class MySQLConnections { private static String driver = "com.mysql.jdbc.Driver" ; private static String url = "" ; private static String username = "" ; private static String password = "" ; public static Connection getConnection () { Connection connection = null ; try { Class.forName(driver); connection = DriverManager.getConnection(url, username, password); } catch (Exception e) { e.printStackTrace(); } return connection; } public static boolean closeResource (Connection connection, ResultSet resultSet, PreparedStatement preparedStatement) { boolean flag = true ; if (resultSet != null ) { try { resultSet.close(); resultSet = null ; } catch (SQLException e) { e.printStackTrace(); flag = false ; } } if (connection != null ) { try { connection.close(); connection = null ; } catch (SQLException e) { e.printStackTrace(); flag = false ; } } if (preparedStatement != null ) { try { preparedStatement.close(); preparedStatement = null ; } catch (SQLException e) { e.printStackTrace(); flag = false ; } } return flag; } }
在Android活动下编写活动的类,调用mysql 注:在Android 中使用mysql,需要新建一个线程才能够进行数据库的操作
下面是一个实例,可以作为参考
1 2 3 4 5 6 7 8 9 10 11 12 13 14 15 16 17 18 19 20 21 22 23 24 25 26 27 28 29 30 31 32 33 34 35 36 37 38 39 40 41 42 43 44 45 46 47 48 49 50 51 52 53 54 55 56 57 58 59 60 61 62 63 64 65 66 67 68 69 70 71 72 73 74 75 76 77 78 79 80 81 82 83 84 85 86 87 88 89 90 91 92 93 94 95 96 97 98 99 100 101 import android.content.Intent;import android.os.Bundle;import android.os.Looper;import android.view.View;import android.widget.Button;import android.widget.EditText;import android.widget.TextView;import android.widget.Toast;import androidx.appcompat.app.AppCompatActivity;import com.henu.eltfood.DataSystem.MySQLConnections;import com.henu.eltfood.Main.register_view;import com.henu.eltfood.R;import com.henu.eltfood.util.Constant;import java.sql.Connection;import java.sql.PreparedStatement;import java.sql.ResultSet;public class Myinfoname extends AppCompatActivity { Connection con; PreparedStatement stmt = null ; String sql = null ; String sql1 = null ; @Override protected void onCreate (Bundle savedInstanceState) { super .onCreate(savedInstanceState); setContentView(R.layout.activity_myinfoname); EditText editq = super .findViewById(R.id.edit1); TextView back4 = super .findViewById(R.id.back4); Button btn2 = super .findViewById(R.id.mbtn2); editq.setText(Constant.username); back4.setOnClickListener(new View .OnClickListener() { @Override public void onClick (View view) { Intent i = new Intent (); finish(); } }); btn2.setOnClickListener(new View .OnClickListener() { @Override public void onClick (View view) { new Thread (new Runnable () { @Override public void run () { try { con = MySQLConnections.getConnection(); }catch (Exception e){ Looper.prepare(); Toast.makeText(Myinfoname.this , "连接数据库失败" , Toast.LENGTH_LONG).show(); Looper.loop(); e.printStackTrace(); } try { sql1 = "update account set username = ? where id = ?" ; sql = "select count(1) as sl from text" ; stmt = con.prepareStatement(sql1); }catch (Exception e){ Looper.prepare(); Toast.makeText(Myinfoname.this , "预编译失败" , Toast.LENGTH_LONG).show(); Looper.loop(); e.printStackTrace(); } try { String fir = editq.getText().toString(); stmt.setString(1 ,fir); stmt.setInt(2 , Constant.id); int rs = stmt.executeUpdate(); if (rs > 0 ){ Looper.prepare(); Toast.makeText(Myinfoname.this ,"修改成功" , Toast.LENGTH_LONG).show(); Looper.loop(); } else { Looper.prepare(); Toast.makeText(Myinfoname.this , "修改失败" , Toast.LENGTH_LONG).show(); Looper.loop(); } }catch (Exception e){ Looper.prepare(); Toast.makeText(Myinfoname.this , "获取失败" , Toast.LENGTH_LONG).show(); Looper.loop(); e.printStackTrace(); } MySQLConnections.closeResource(con,null ,null ); } }).start(); } }); } }
